Back in part 2 I went over how to setup a Visual Studio 2013 IDA Pro plug-in project to use the Qt 4.8.4 framework. Now we’ll discus the basics of creating custom user interfaces.
With the Qt environment there is a build setup with it’s own tool-chain (located in your “C:\Qt\4.8.4\bin” folder).
I’ll briefly cover the key components here:
The most basic C++ object most everything is derived from is the “QObject” class, then from there the QWidget class is the base class of all user interface objects that you’ll see a lot of it. Another key one is QApplication but since we’re making plug-ins we’ll only need to occasionally reference IDA’s own instance of this class.
When you work with UIs with Qt you’ll want to use the Qt designer. It’s a UI design tool similar to what’s in VS (Visual Studio) with it’s dialog and forums editors.
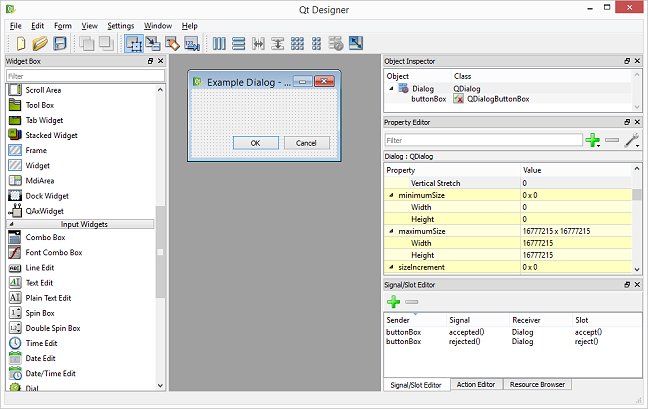
Here you’ll be able to add and edit the typical button types, views, lists, tab widgets/controls, and text edit widgets, etc. Other considerations like if you want your window/dialog to be modal or not you can set from the designer too. Qt has a robust system and various options for layout; in particular if you want to setup your UI and it’s elements for resizing (see below about the “Qt bible” book for more info).
You can customize the styles, fonts, etc., for the designer and, or, use Qt style sheets.
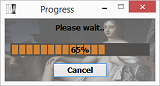
Example from my custom wait box:
Note you don’t actually have to use the designer; you could build UI’s dynamically in code, etc.
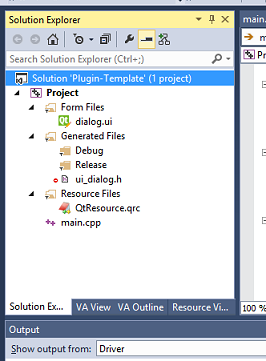
When you put your .UI file(s) created by the designer into your VS project and do a build the Qt tool will construct a “.h” header data file for you included into your project automatically (the “ui_dialog.h” here in the screenshot).
Qt has it’s own C++ type introspection system that is somewhat similar to the native C++ Run-time type information setup. A Qt tool, the moc (Meta-Object Compiler), will auto-generate “.CPP” file(s) to your VS project to facilitate the feature. You’ll need to learn when and where to put an “OBJECT” macro in your Qt class .h header files so this build tool will be invoked for it.
Finally, similar to Microsoft “.RC” format resource files Qt has it’s own “.QRC” format with it’s own resource compile tool and support API.
These .QRC files are a pain XML format that you can manipulate from the Qt designer, the separate “Qt Resource Editor”, or even by hand from a text editor. Add your .QRC file to your VS solution so it’s added into the build tool chain. Double click on it in the solution explorer window and it will invoke the resource editor for you. When you build your project a .CPP resource data container will be auto-generated.
Note you still can use the Microsoft resource system for parts of your plug-in if you want.
To make it easier to get started I made a simple IDA plug-in template/example solution you can get here > Qt IDA Plugin Template.zip <
On my machine I setup an environment variable “IDADIR” that points to my IDA Pro installation folder (IDADIR = “C:\Program Files\IDA Pro”). Within my IDA folder I put the IDA SDK in a sub-folder labeled “SDK” .
There’s a nice tool to manage and edit environment variables in Windows called Rapid Environment Editor.
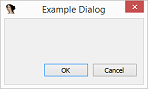
The simple example dialog invoked from IDA:
As you can see with the example project in order for the Qt build tools to function you’ll need to have a “GeneratedFiles” folder in your project root (where your .CPP, .H, .vcxproj, etc., files are). An actual folder, not just the “filter” one you see in the Solution Explorer window. The VS Qt extension will put various auto generated files in there.
Note: There is some oddness you’ll run into where the Qt extension expects you to have a “Source” filter (those little organizational virtual folders in your “Solution Explorer” window) so it might create one for you too. Just move the source files out of there to wherever you want them to go if you don’t want to use the “Source” filter.
Converting an existing project for Qt UI steps (from Stackoverflow: Add Qt to existing Visual Studio c++ project):
1) Shutdown VS if your plug-in solution is currently loaded.
2) From the root of where your project file (project file, not solution) create the necessary new folder “GeneratedFiles”.
3) Open up the .vcxproj” file in a text editor.
4) In that file, search down for the first “<Keyword>” section (there should only be one) and change it’s contents from “Win32Proj” to “Qt4VSv1.0” so the finished line will be “<Keyword>Qt4VSv1.0</Keyword>”
5) Load your project back up in VS.
6) From the VS QT menu at the top of VS do “Convert project to Qt Add-in project”.
7) Shut down down VS solution again and reload it for a refresh.
If all goes well Qt should now see your project as a Qt one and do it’s own steps as you build, etc.
Hopefully this guide will help others trying to make a custom C++ Qt UI for their IDA plug-ins.
There is a lot more to Qt that I’ve skipped and glossed over to keep these posts short.
The more I learned and used Qt I liked and now would prefer to use it for application development over say Microsoft’s mind-numbing MFC. And it has support for multiple-platforms so in the case of IDA plug-ins one should be able to build for the Linux or Mac versions as well. Note Qt is not free for commercial applications you’ll probably have to buy a license in that case.
To learn QT run the Qt Assistant from the start menu (“C:\Qt\4.8.4\bin\assistant.exe”). hen A book you’ll want to get is the unofficial “Qt bible”: C++ GUI Programming with Qt 4 (2nd Edition) C++ GUI Programming with Qt 4 (2nd Edition).
There’s also online documentation at http://doc.qt.io/qt-4.8/, and various other helpful pages on the web available from searching Qt related entries on stackexchange.com, etc.
End of the “Qt 4.8.4 on Windows for IDA Pro C/C++ plug-in development” series.
One thought on “Qt 4.8.4 on Windows for IDA Pro C/C++ plug-in development – Part 3 of 3”
Leave a Reply to Russell Sanford Cancel reply
You must be logged in to post a comment.
Thanks for the writeup, I attempted trying to get this setup about a year ago and gave up in frustration. Think there was some valuable info in here that will aid me in giving my plugins some pretty interfaces. Thanks!